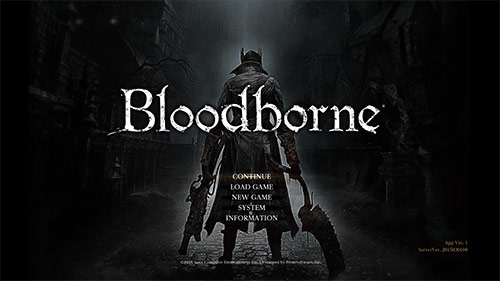


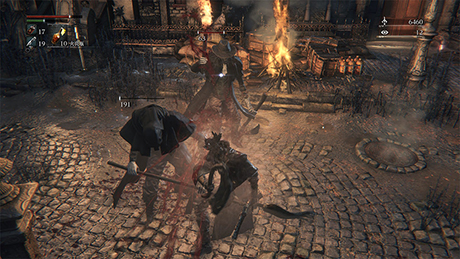
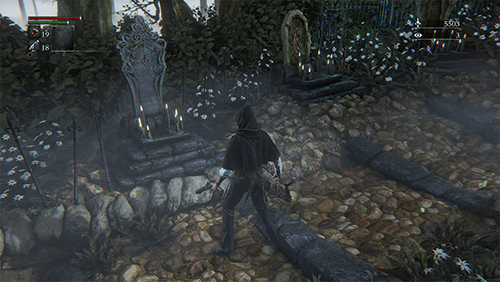
Welcome to Yharnam, a distant forgotten city in an isolated valley far to the east. A place said to be cursed; infamous for its local affliction known as the scourge of the beast.
The scourge erodes one's reason, until man becomes beast. At night, the hunters track down these inhuman creatures.
Yet, this heretical town is also home to an ancient medical practice. Those with incurable afflictions brave the long journey to the city, seeking Yharnam's mysterious treatment.
| Directional buttons | Select menu option |
| button | Confirm |
| button | Return to previous screen |
| left stick | Move character |
| right stick | Move camera |
| button | Right-hand weapon (trick weapon) attack |
| button | Strong right-hand weapon (trick weapon) attack |
| Hold button | Charge attack |
| Forward on left stick + press button |
Jumping attack |
| button | Transform weapon (trick weapon) |
| button | Left-hand weapon attack (Unleashes unique attack when two-handing right-hand weapon) |
| button | Interact |
| button | Use blood vial (restores HP) (Cannot be used if supply is depleted) |
| button | Use item |
| button | Backstep |
| Hold button + left stick | Dash |
| button (while dashing) | Dash roll |
| button + left stick | Roll | button + left stick (while locked-on to enemy) |
Quickstep |
| button (when near enemy) | Toggle lock-on |
| button (no enemies nearby) | Centre camera |
| directional button | Refill Blood Bullet (until expiration) (Cannot be used without sufficient remaining HP) |
| directional button | Switch items |
| directional button | Switch right-hand weapons |
| directional button | Switch left-hand weapons |
| OPTIONS button | Open System menu |
| touch pad button (press left-hand side) | Open Gesture menu |
| touch pad button (press right-hand side) | Open Personal Effects menu |
| Press the button while attacking, rolling, or quickstepping to transform the right-hand weapon while attacking. |
| With a firearm equipped, a shot fired by pressing the button with proper timing just before an enemy attacks will cause the enemy to stagger. An enemy can also be caused to stagger by facing its back and holding the button to unleash a charge attack. Once an enemy staggers, press the button to execute a visceral attack. | 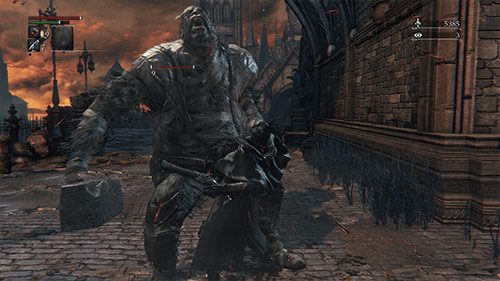 |
| When an enemy's attack hits, a portion of the HP gauge briefly turns orange, indicating the amount of damage inflicted. Attack the enemy before the orange bar disappears to restore a given amount of HP. |
| Blood Bullets are crafted with your own blood, and can replace Quicksilver Bullets for use in firearms. Press the up button to restock a blood bullet at the cost of HP. Blood Bullets are lost upon death or upon entering the Hunter’s Dream. (Sufficient HP required to craft Blood Bullets.) |
| Click the left side of the touch pad to open the gesture menu, refer to the icons on the gesture menu, and move the controller accordingly while holding the button. |  |
| Press any button on the title screen to open the following menu. |
|
| Continue | (requires save data) Resume play using the most recent save data. |
| Load Game | (requires save data) Resume play with selected save data. |
| New Game | Start a new game. |
| System | Change settings. |
| Log In | While offline, select this to test connection and use network features. |
| Information | Announcements can be viewed here when online. |
Bloodborne uses an auto-save feature that automatically saves progress at set intervals. While saving, an auto-save icon appears at the upper right of the screen. Auto-saving overwrites previous data.
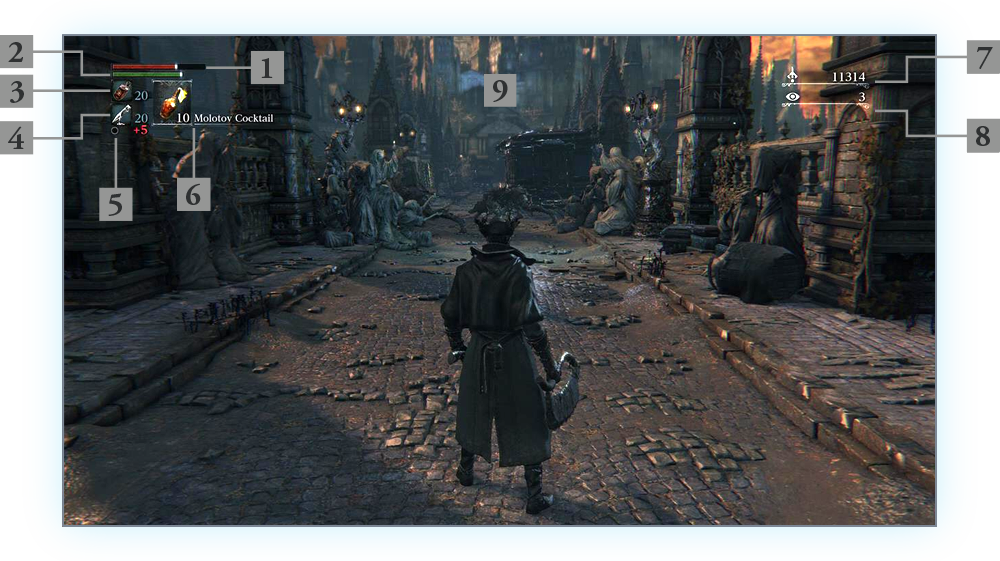
The main game screen is composed of the following elements. An auto-save icon appears in the upper right of the screen while saving.
Indicates your character's HP. Depleted by enemy attacks. Loss of HP results in death.
Restore HP by using blood vials or rallying.
Indicates your character's stamina. Depleted by player actions such as attacking, dashing, and quickstepping. While stamina is fully depleted, these actions cannot be executed. Stamina automatically replenishes over time (but not while executing stamina-depleting actions).
Indicates remaining blood vials. Press the button to use one.
Indicates remaining Quicksilver Bullets. Required to fire guns and use certain items. When Blood Bullets are crafted, remaining Blood Bullets are indicated just below remaining Quicksilver Bullets.
Indicates the status of the right-hand weapon. When wielding a trick weapon, pressing the button transforms the weapon, a state indicated with yellow.
Items selected as Quick Items are shown here. Press the button to use the indicated item, and the down button to switch items.
Indicates total Blood Echoes.
Indicates level of Insight.
Appears when your character receives status-altering damage. Status-altering damage fills the resistance gauge. Once full, your character’s status becomes afflicted. When the gauge is depleted, status returns to normal. Your character can be affected by the following status afflictions.
(While transformed into a beast, a fuller resistance gauge boosts effect of transformation.)
Slow poisoning: Slowly erodes HP.
Rapid poisoning: Rapidly erodes HP.
Frenzy: erodes HP at an alarming speed.
Transformed: A longer gauge strengthens attacks but also reduces defence.
| Take control of the character and explore the environment. There are things to inspect, items to pick up, and messages to read. Press the button to execute the corresponding action. |
 |
| Some enemies encountered in the field will attack your character. Press the or button to attack with the right-hand weapon, or the button to attack with the left-hand weapon. Press the button to transform the right-hand weapon. Face the many threats encountered in the field by taking full advantage of the wide array of weapons available. Defeating enemies yields Blood Echoes. Blood Echoes are used to level-up your character and to purchase items. |
 |
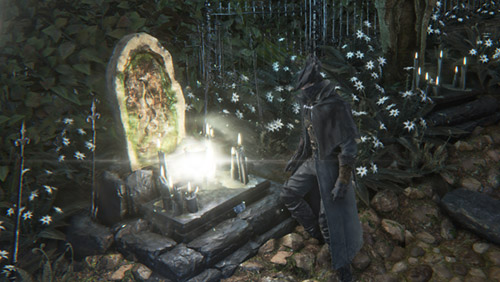
| Speak to a gatekeeper messenger in the field to enter the Hunter’s Dream. Upon death, your character is revived at the lamp last lit, or near the last gatekeeper messenger in the spot you awoke from the Hunter’s Dream. |
 |
| Insight increases as your character gains knowledge beyond the ken of men. Insight increases as the story progresses, and can be used in network play or traded for items. |
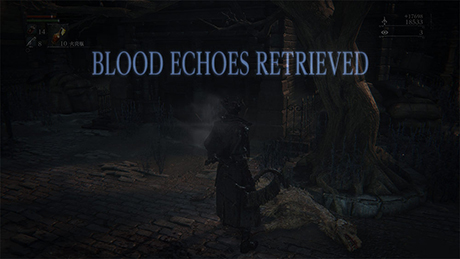
| When your character dies, all Blood Echoes are left behind at that location. These Blood Echoes can be reclaimed by travelling to that location, unless they are claimed first by an enemy. In that case, search for the enemy with glimmering blues eyes, and defeat it to reclaim all Blood Echoes. If your character dies again before reclaiming lost Blood Echoes, those Blood Echoes can never be retrieved. |
 |
The Hunter’s Dream is your character’s home base, where items are purchased, levelling-up is conducted, and weapons are fortified and repaired. Your character can be transported back to the Hunter’s Dream by speaking with gatekeeper messengers in the field.
| Use to return to the last area (selected location). |  |
| Use Blood Echoes to buy items from the bath messengers, or to sell unneeded items. As the story progresses, additional items become available for sale. |  |
| An ordinary doll, but as the story progresses, something might change. |
 |
| A workshop inhabited by Gehrman, helper of hunters. It is here that a hunter makes preparations for the hunt. |
| Use Blood Echoes alone to repair weapons, or in combination with fortification items to fortify weapons. Press the left and right buttons to select a category, the up and down buttons to select a weapon, and the button to confirm a selection. (Sufficient Blood Echoes and fortification items are required to make repairs and fortify weapons.) |
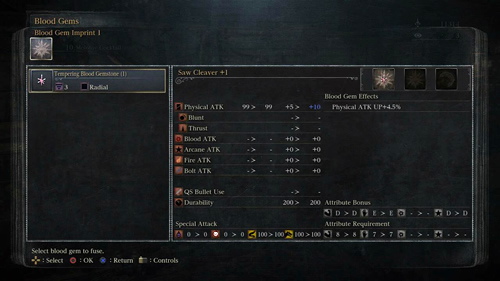
| After the story reaches a certain point, Blood Gems can be fused to and removed from weapons. Up to three Blood Gems can be fused to weapons, each having its own effect, such as improved attack or an increased chance of causing status afflictions. Use the left and right buttons to select a slot, the up and down buttons to select a Blood Gem, and the button to fuse the Blood Gem. Select a fused Blood Gem and press the button to remove it. |
 |
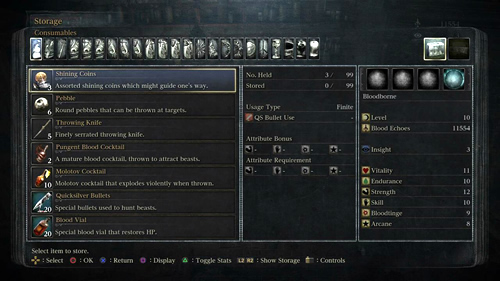
| Items in the player inventory can be placed in storage. Each item in the player inventory is limited by a maximum capacity. Acquired items which exceed the maximum capacity for that item are automatically sent to storage. |
 |
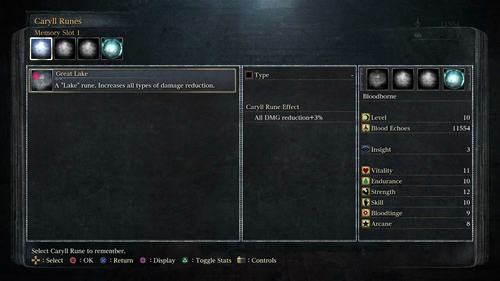
| With the proper workshop tools, one can memorise Caryll runes. Memorising Caryll runes yields various effects, including improved character stats and increased capacity for holding Blood Vials and Quicksilver Bullets. |
 |
| After gaining a given amount of Insight, a messenger appears that offers to trade items for it. As the story progresses, additional items become available for purchase. |
 |
| Use the stump messenger to customize the appearance of messengers that appear in the field. After acquiring a messenger accessory, show it to the stump messenger, and thereafter all messengers will adorn that accessory. |
 |
| Offer items to a Holy Chalice and conduct a ritual to unseal a Chalice Dungeon. Conducting further rituals at the same altar unseals new Chalice Dungeons. With a network connection, you can search for Chalice Dungeons unsealed by other players, and as the story progresses, new types of Chalice Dungeons can be unsealed. Inspect the Makeshift Altar to automatically join an unsealed dungeon. (A Short Ritual Root Chalice is required to use the Makeshift Altar.) |
 |
| Press the OPTIONS button to display the icons of the system menu. Select an icon with the directional buttons, then press the button to open the corresponding menu. |  |
| Inventory: | View or use items currently held. |
| Status: | View your character’s status. |
| System: | Configure various game settings. |
| Arms: | Equip weapons. |
| Attire: | Equip pieces of attire. |
| Quick Items: | Set quick items. |
View the items you are currently carrying. To use or discard consumable items, press the up and down buttons to browse through items, then press the button to select an item.
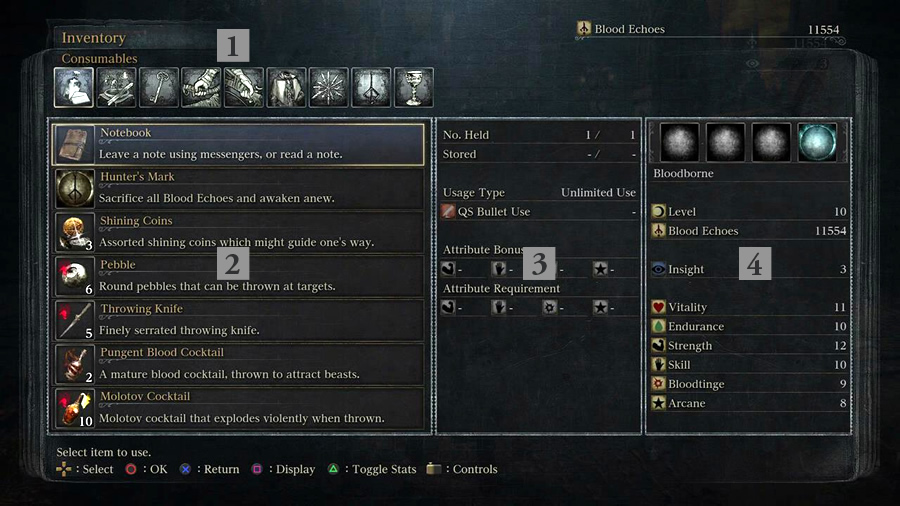
These correspond to each item category. Press the left and right buttons to switch tabs.
Displays the list of inventory items in the currently selected category.
Displays information about the selected item.
Displays your character’s current status.
| View your character’s status. The left side of the screen displays your character’s level and attributes, such as vitality, while the middle displays HP, attack values (ATK), and status affliction resistance values, and the right side displays Caryll rune effects and damage reduction values. | 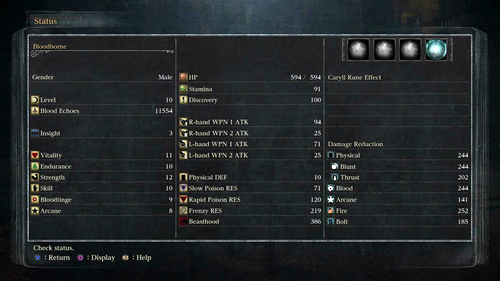 |
Configure control settings, music volume and other sound settings, the brightness setting, and network settings. Select “Exit Game” to save your current progress and return to the title menu.
Equip weapons. To equip a weapon, first press the or button to select a slot. Next, press the up and down buttons to select the desired weapon, and then press the button to equip it. To remove a weapon that has already been equipped, select it and then press the button again.
(You may be unable to equip a weapon if your character does not have the attributes required to wield it.)
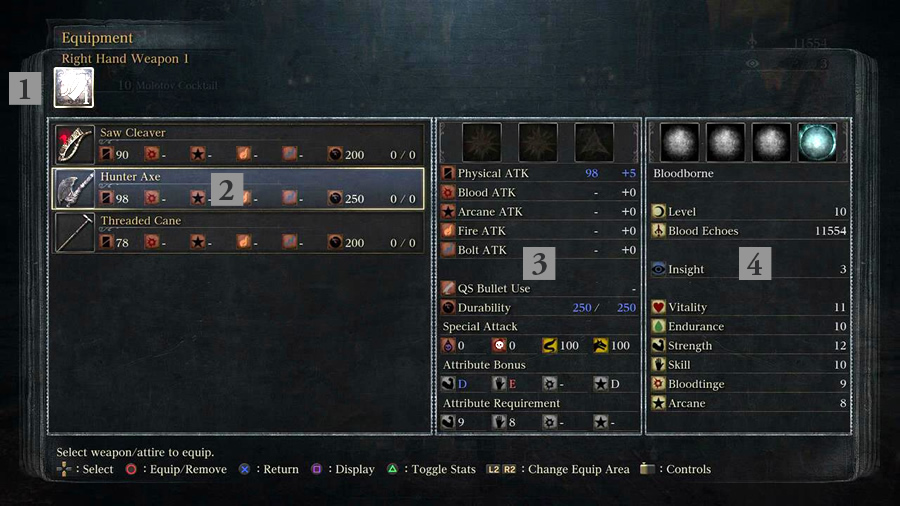
You can equip two weapons each to your character’s left and right hands.
Displays a list of weapons that can be equipped to the currently selected slot.
Displays information about the weapon and any Blood Gems that are fused to it.
Equip attire to your character. Attire is equipped in a similar manner to weapons.
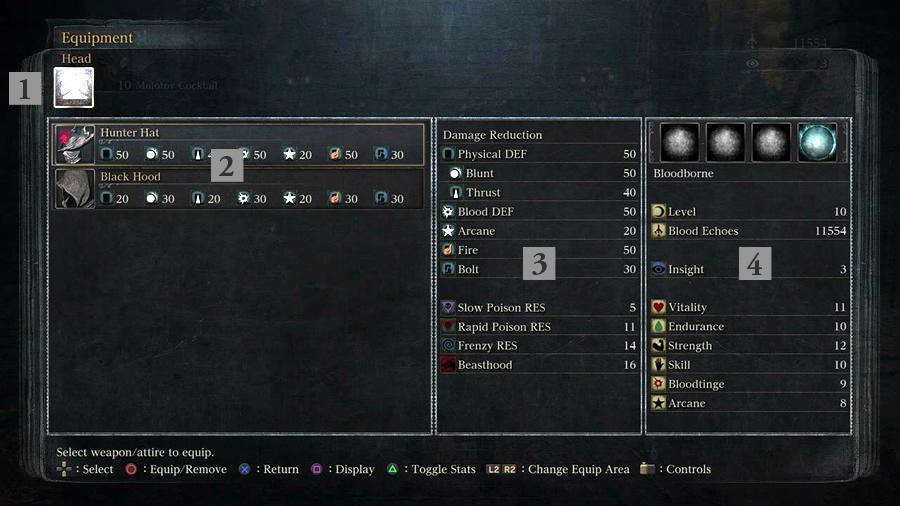
There are four slots: head, chest, arms and legs.
Displays a list of attire that can be equipped to the currently selected slot.
Displays information about the selected attire in a list.
Set quick items. Once set, these items can be used in the field by pressing the button.
Select a quick item slot by pressing the left or right buttons, then use the up and down buttons to select an item and the button to set it. To remove an item that has already been set, select it and then press the button again.
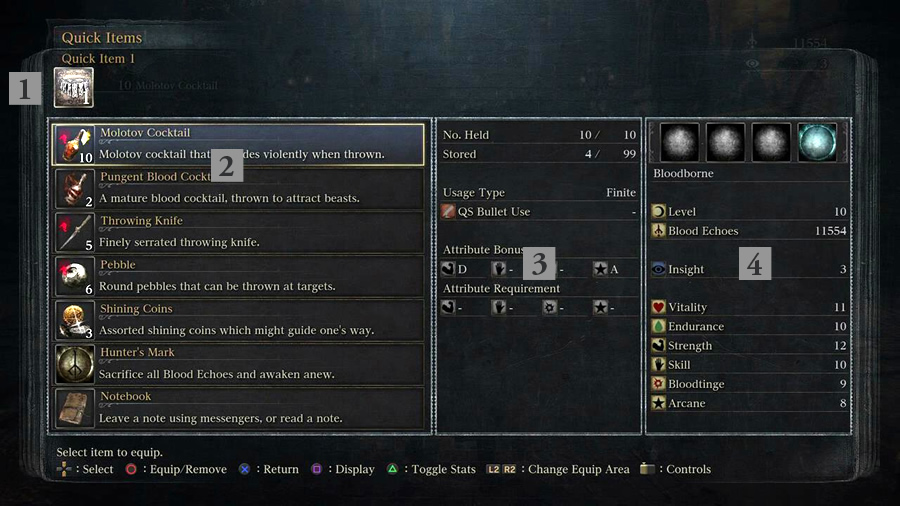
You can set up to six different items.
Displays a list of items that can be set to the selected slot.
Displays information about the selected item.
By playing online, you can experience various phenomena that occur automatically, and engage in communication with other players. Making progress in the story will expand the range of available network play features.
| Other players playing in the same location as you will appear as apparitions. |  |
| A grave marker will appear in locations where other players have died. Approach the marker and press the button to watch that player’s spectre reproduce their final actions. |  |
| Use the Notebook item to leave messages for players in other worlds at your current location, or view your note history. | 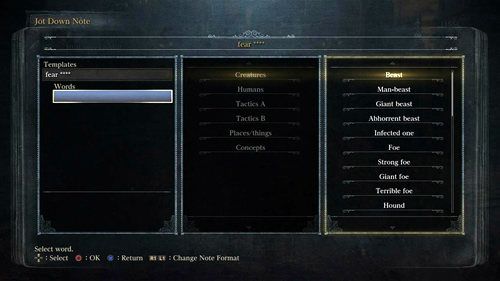 |
| Notebook Menu | |
| Jot Down Note: | Leave a note constructed from templates, words and conjunctions at your current location. |
| Notes Made: | View a history of notes that you have written so far. |
| Notes Read: | View a history of notes that you have read so far, and rate them. |
Notes will appear on the field during play. Approach a note and press the button to read it.
(When reading one of your own notes, you can click left on the touch pad button to delete it.)
When reading a note, click left on the touch pad button to rate it as “fine”, or right to rate it as “foul”.
Rating a note as “fine” will restore HP to the author.
| Use the Beckoning Bell and Small Resonant Bell items to challenge enemies in a group of up to three players. For the purposes of this explanation, the player who requested co-operative play will be referred to as the host, and those who answered the player’s call will be referred to as guests. |
 |
| (You can only host co-operative play in areas where you have not yet defeated the boss. Additionally, there are some areas where co-operative play is not allowed, or where certain conditions must be met before you can play co-operatively.) | |
(When requesting co-operative play as a host)
(When joining in co-operative play as a guest)
* The ripples can be seen if you stand still. In areas where co-operative play is not allowed, a cross will appear on the bell icon and the ripples will stop. To cancel a request to join or initiate co-operative play, use the Silencing Blank item.
Guests (or specific guests) will be returned to their worlds should co-operative play end under any of the following conditions:
| Passwords: You can play with other players using a shared password by setting a password via the Password Matching option in Network, accessible from the System menu. (Passwords are only supported in co-operative play. This feature does not apply to adversarial play.) |
Ring the Sinister Resonant Bell item in an area where the bell-ringing woman appears to invade other players and initiate adversarial play.
For the purposes of this explanation, the invaded player will be referred to as the host, while invaders will be referred to as guests.
(You can only be host to adversarial play in areas where you have not yet defeated the boss. Additionally, there are some areas where adversarial play is not allowed, or where certain conditions must be met before you can engage in adversarial play.)
(As a host)
(As a guest)
* The ripples can be seen if you stand still. In areas and situations where adversarial play is not allowed, a cross will appear on the bell icon and the ripples will stop. To cancel a request to invade, use the Silencing Blank item.
Adversarial guests will be returned to their own world should adversarial play end under any of the following conditions:
Additionally, adversarial guests can use the Silencing Blank item to return to their own worlds. The host cannot dismiss adversarial guests.
Beneath Yharnam lies an intricate old labyrinth of myriad, endless ruins. By conducting a Chalice Ritual, the seal to the old labyrinth can be broken, allowing you to explore it in the form of Chalice Dungeons.
| Select “Chalice Ritual” at a Ritual Altar in the Hunter’s Dream, then select a Holy Chalice and an offering in order to conduct the ritual and unseal a Chalice Dungeon. When using a root chalice, the structure of the unsealed Chalice Dungeon will change each time the ritual is conducted. |
 |
Press at the altar where you conducted the ritual to make your Chalice Dungeon accessible to other players. You can choose to make it public and accessible to all players, or to make it private and share it only through Chalice Glyphs (a set of eight characters listed in the dungeon’s details). Select “Chalice Dungeon Search” at an altar where you have not conducted the ritual to search for public Chalice Dungeons, or “Chalice Glyphs” to search for Chalice Dungeons that have been set as either public or private.
The Makeshift Altar found in the Hunter’s Dream can be used once you have obtained a certain item. Using the Makeshift Altar allows you to perform quick-searches for dungeons other players have created or for co-operative or adversarial play sessions.
If you have installed the Bloodborne: The Old Hunters DLC to the original Bloodborne game, or are playing Bloodborne Game of the Year Edition, you can access the new area by following the steps below.
| Defeat the boss of the Cathedral Ward and examine the altar in the back of the room to change the in-game time to night. | 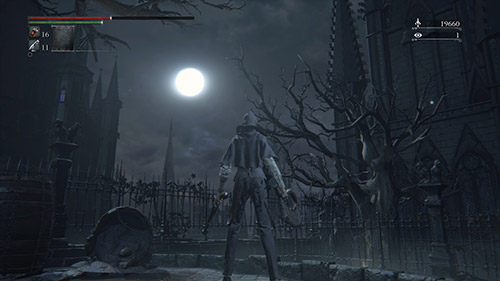 |
| Go to the Hunter’s Dream and receive the Eye of a Blood-drunk Hunter from a messenger. | 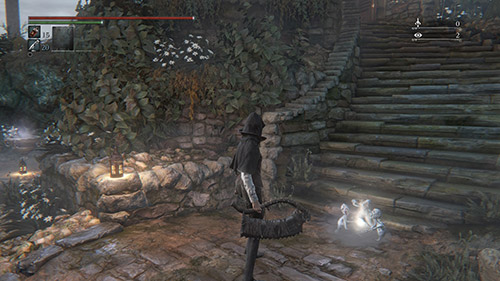 |
| Go to the Oedon Chapel and leave via the left-hand exit to enter a square. | 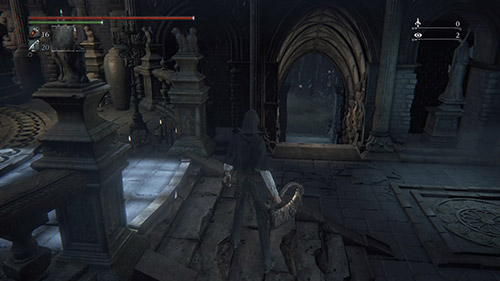 |
| Go to the right-hand end of the square to trigger an event. This event will take you to the new area: the Hunter’s Nightmare. | 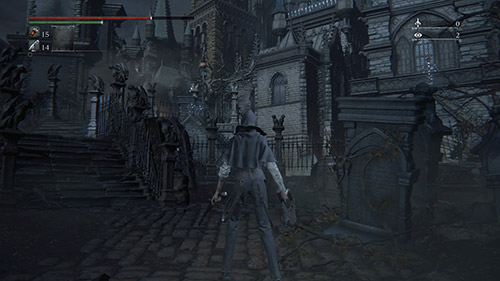 |
| Lighting the lamp in the new area will allow you to travel to and from the area via an Awakening Headstone in the Hunter’s Dream. | 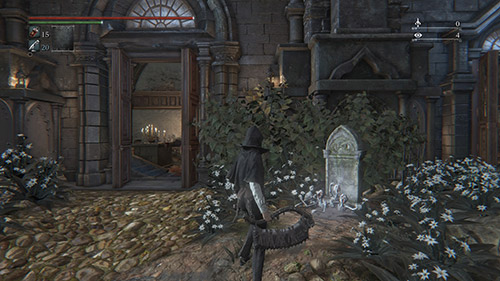 |
If you start a New Game+ you will have to perform all the steps necessary to access The Old Hunters content again.